Escrito por Vakker Editorial Team Archivado bajo All collections, best table lamps for bedroom, Cestita Table Lamp, decorative table lamps, elegant table lamps for living room, glass, Glass Light, glass table lamp, modern bedroom table lamps, modern table lamp, modern table lamps for living room, nightstand table lamps, Table Lamp, trendy table lamps, white table lamp 🧺 Chasing Light: Meeting the Mediterranean Breeze in the Curve of Walnut dic 23, 2025 Escrito por Vakker Editorial Team Sigue leyendo
Escrito por Vakker Editorial Team Archivado bajo All collections, All Rooms, bathroom, Bedroom, chandelier for living room, Dining Room, dining room chandelier, glass, glass chandelier, Glass Light, Talia Chandelier, Talia Linear Chandelier 🎈 What if Bubbles Never Popped? I Turned an Afternoon Dream into the Talia Collection dic 17, 2025 Escrito por Vakker Editorial Team Sigue leyendo
Escrito por Vakker Editorial Team Archivado bajo All collections, All Rooms, bright floor lamps for living room, Ceiling Lamp, chandelier for living room, Dining Room, Glass Ceiling Lamp, glass chandelier, Glass Light, Living Room, living room ceiling Lamp, modern dining room lighting 🌬️ The Frozen Breath: Exploring the Eternal Charm of Hand-Blown Glass Lighting nov 27, 2025 Escrito por Vakker Editorial Team Sigue leyendo
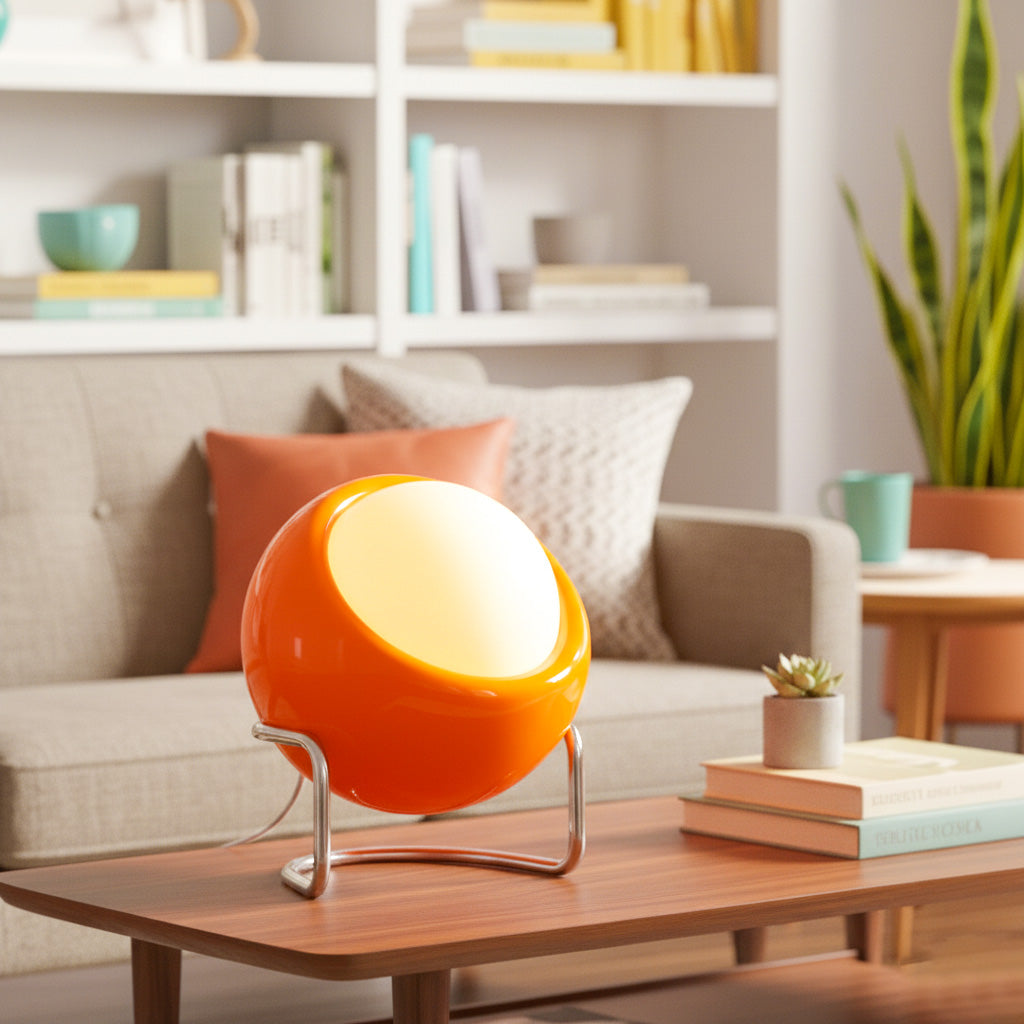
Escrito por Vakker Editorial Team Archivado bajo Bauhaus Camica Table Lamp, Bedroom, best table lamps for bedroom, colorful table lamp, decorative table lamps, Glass Light, glass table lamp, Hecho Vinen Table Lamp, living, Living Room, modern bedroom table lamps, modern table lamp, modern table lamps for living room, orange table lamp, Table Lamp Say Goodbye to Boring Rooms: These Colorful Glass Lamps Are a Shot of Pure Joy oct 12, 2025 Escrito por Vakker Editorial Team Sigue leyendo
Escrito por Vakker Editorial Team Archivado bajo Baluna Wall Lamp, bathroom, bathroom Modern Style, bathroom wall lamp, beautiful ceiling fans, Bedroom, bedroom ceiling light fixtures, bedroom ceiling lights, best floor lamps, black floor lamp, brass ceiling lights, brass chandelier, bright ceiling fan, bright floor lamps for living room, Ceiling Fan Light, Ceiling Light, Chandelier, chandelier for living room, cheap chandeliers, circular ceiling light, Commercial interion, Contemporary Lamps, Dining Room, dining room light fixtures, dining room sconces, elegant chandelier, elegant floor lamp, Entry/Foyer, entryway ceiling light, Fabric Floor Lamp, Farmhouse Style, Floor Lamp, floor lamps for living room, Flushmount, geometric pendant light, Glass Light, Golden Lamps, Hallway, home collection ceiling fan, indoor chandeliers, Installing Indoor Lighting, Kids room Modern Style, Kitchen, Living Room, Metal Lamp, metal sconces, mid century floor lamp, modern dining room lighting, modern floor lamp, modern wall lights, Nodes Semi-Flush Ceiling Light, Oebit Macy Chandelier, Office Lighting, Outdoor Lighting, Pendant Light, Restaurant, Ribbon Pendant Light, room ceiling light, standard floor lamps, standing lamps for living room, surface ceiling light, Table Lamp, unique chandeliers, unique floor lamps, vintage chandelier, visual comfort wall sconce, wall ceiling light, Wall Lamp, wall lights indoor, white ceiling light, white glass lamp, wooden ceiling fan with light, Wooden Light, wooden tripod lamp A Guide to Installing Indoor Lighting: Tips from a Lighting Expert mar 11, 2025 Escrito por Vakker Editorial Team Sigue leyendo
Escrito por Vakker Editorial Team Archivado bajo bathroom, bathroom Modern Style, bathroom wall lamp, beautiful ceiling fans, bedroom ceiling light fixtures, bedroom ceiling lights, black floor lamp, brass ceiling lights, brass chandelier, bright ceiling fan, bright floor lamps for living room, Ceiling Fan Light, Ceiling Light, Chandelier, charlotte, cheap chandeliers, circular ceiling light, Commercial interion, Contemporary Lamps, Dining Room, dining room light fixtures, dining room sconces, elegant chandelier, elegant floor lamp, Entry/Foyer, entryway ceiling light, Fabric Floor Lamp, Farmhouse Style, Floor Lamp, floor lamps for living room, Flushmount, Glass Light, Hallway, Kitchen, Living Room, metal sconces, mid century floor lamp, modern dining room lighting, modern floor lamp, modern wall lights, Nodes Semi-Flush Ceiling Light, Oebit Macy Chandelier, Office Lighting, Outdoor Lighting, Pendant Light, Restaurant, Ribbon Pendant Light, room ceiling light, standard floor lamps, standing lamps for living room, surface ceiling light, Table Lamp, unique chandeliers, vintage chandelier, visual comfort wall sconce, Wall Lamp, white ceiling light, white glass lamp, wooden ceiling fan with light, Wooden Light Understanding Color Temperature: Choosing the Right Light for Your Space mar 11, 2025 Escrito por Vakker Editorial Team Sigue leyendo